Monday, November 25, 2013

NO-BAKE CHOCOLATE PB OATMEAL COOKIES

Here we are, only 3 short days away from Thanksliving, or Tofurky Day, as we vegans call it! I will be cooking up a storm for my family, and making lots of yummy sweets! I made these so I could share this recipe with you and, since they are one of my Mom's favorite, I could send her and Dad home with some.
These cookies could not be an easier, and they are pretty healthy...I mean, for a cookie. Just beware, because they are addictive!


NO-BAKE CHOCOLATE PB OATMEAL COOKIES
(Makes 27-30 cookies)

*2 C Vegan, Organic sugar
*8 TBS (1 stick) of vegan butter
*1/3 C cocoa powder
*1/2 C non-dairy milk (I prefer Coconut milk)
*1 TBS vanilla
*1/2 C natural peanut butter
*3 1/2- 4 C rolled oats


Step 1:
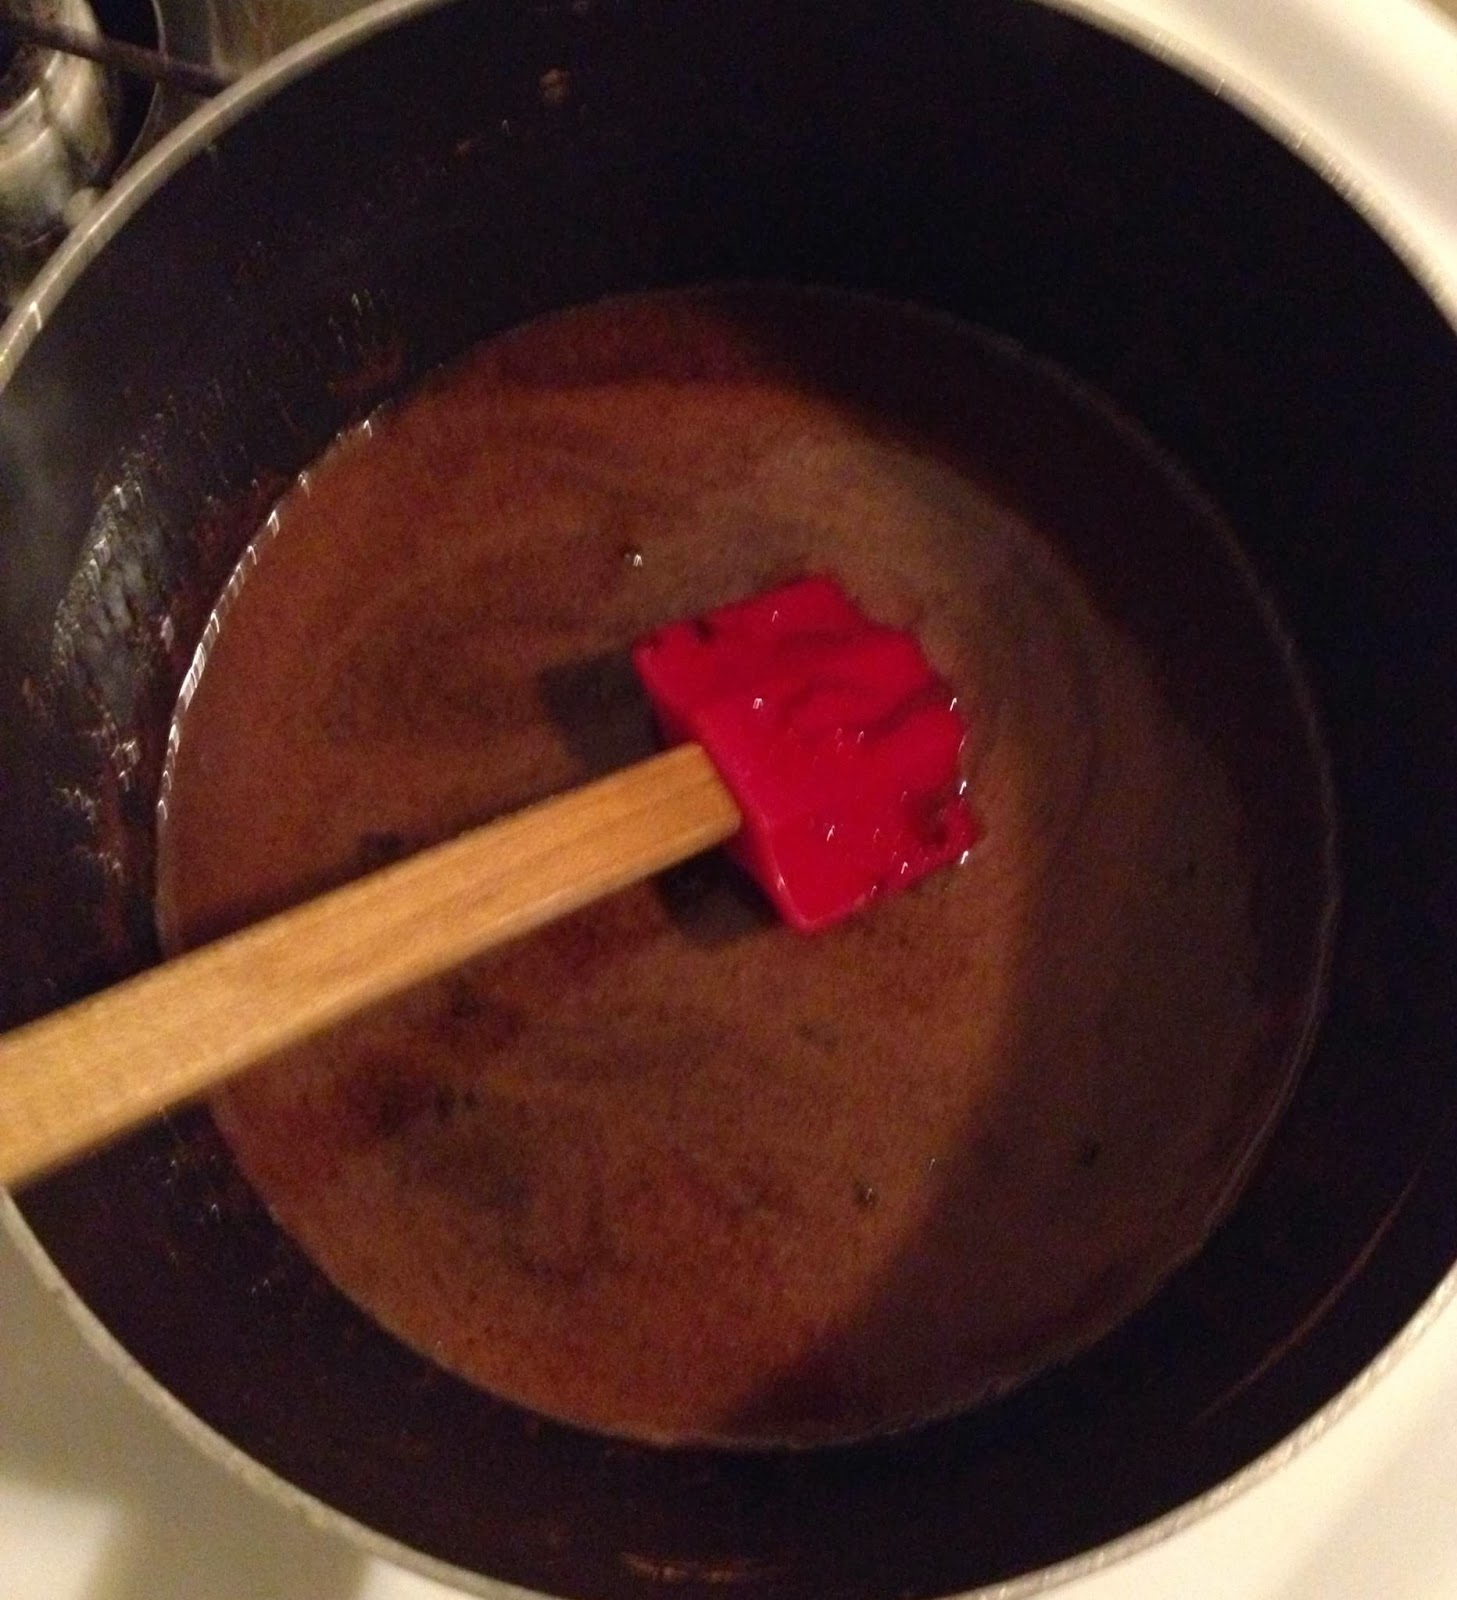
In a medium saucepan, combine the sugar, butter, cocoa powder, milk and vanilla. Bring to a slow boil and then simmer, stirring frequently, until all the sugar is dissolved.


Step 2:
Add the peanut butter, and continue stirring until it is melted and blended in evenly.


Step 3:
Remove pan from heat and stir in your oats. Begin with 3 C. Stir until evenly coated. If still watery, continue adding until it reaches a thick consistancy.


Step 4:
Line a cookie sheet with parchment paper. Drop mixture by heaping TBS onto the parchment. Place cookies in fridge for about an hour to firm up.


To store: keep in an airtight container in the fridge. These are best eaten chilled, when left out, they can get very gooey! They will keep in the fridge for up to a week and a half, or freeze, for up to 3 months!
 Here's to a great Hoilday season!! I hope you and yours enjoy these cookies as much as we do!!


Tuesday, November 19, 2013

YUMMY STUFFED MUSHROOMS

The time is here to start thinking about all the Holiday dinners, parties and family events that you will be hosting/attending! If your family is anything like mine the Holiday's, and gatherings, are centered around good food, tasty cocktails and time with those you love the most. This time of the year is precious to me, and one of the only times I get to hang with my parents, relax and just have a few days to spend quality time together. I LOVE Thanksgiving and Christmas!!! I have been thinking about my Thanksgiving menu for weeks now and although I have my favorites, that I can't stray from, I always like to mix it up and try a few new items each year. While my Mom and I are cooking (and we COOK; last year we were in the kitchen for about 7 hours [with mimosas in hand, of course]totally worth every second, though!!) we like to munch on appetizers, and give the boys something to snack on while watching football and kicking back. These have always been a favorite; everytime I make these for a party, they go like hotcakes! Over the next few weeks, I will be sharing a lot of my favorite savory, and sweet, Holiday recipes with you. All of the recipes are 100% VEGAN, and will show you that you can have all the YUM of the Holiday's while staying 100% PLANT BASED. What could be better?!?
This IS NOT my recipe. I just veganized (and slightly tweaked) it from one of those Nabisco Holiday Appetizer books. I know there are hundreds of stuffed mushroom recipes out there, but these really are the best I've had. They are pretty easy to make, and don't require many ingredients. Everytime I make these, I double the recipe, and I recommend doing the same!! They get eaten up fast!!! You can also prep these the day before (I always do on Thanksgiving) so all you need to do on the day of, is pop them in the oven! I hope you and your family will enjoy these as much as we do!

STUFFED MUSHROOMS
(Makes 20 mushrooms)

*20, medium sized, mushrooms. I usually use cremini, this time I used white (they were out at WF)
*3 TBS Vegan butter (I'm partial to Earth Balance)
*4 TBS finely chopped white onion
*4 TBS finely chopped red pepper
*16, "Ritz" style crackers, finely crushed. I use an organic brand due to the fact that Ritz contain HFCS, which I have banned from my house years ago. You can also use Panko, if desired (1/2C)
*3 TBS Vegan parm
*2 tsp Organic Italian seasoning/dressing mix

Step 1:
Wash mushrooms throughly


Step 2:
Carefully remove the stems from the mushrooms, keeping the stems and setting them aside, and putting the mushrooms on a rimmed baking sheet or 13X9 pan


Step 3:
Gather all your ingredients so they are ready to go


Step 4:
Take the stems you removed from the mushrooms, and finely chop enough to equal a 1/4C
Finely chop your onion and red pepper


Step 5:
Add your butter to a saute pan and melt over med-high heat


Step 6:
Add your onion, mushroom stem, red pepper mixture. Cook and stir until veggies are tender


Step 7:
Turn off heat and add cracker crumbs, vegan parm and italian seasoning. Stir until well incorporated


Step 8:
Using a small spoon, scoop mixture into the mushroom caps. You can pile it pretty high, it will cook down slightly


Step 9:
In a 400 degree oven, bake for 15-20 minutes, or until heated through and mushrooms are softened and cooked


Now, try not to eat them all in one sitting!!

Monday, November 11, 2013

THE 50/50 CHALLENGE

It's hard to believe that it's already November 11th, right?!? I don't know about you, but this is about the time my body, and mind, start to (try) to go into "hibernation" phase. I've never really succumbed, and allowed that to happen, but year after year my body tries. It's very easy to slip into that mindset of "I'll start tomorrow", "One day off won't hurt" (which we all know turns into 2,3,4) or "I'll start after the Holidays".  
Well, I'm starting TODAY! I am hosting a 50 day, 50-a-day, challenge that I would love to challenge you to do with me. It begins November 12th and ends on December 31st! No gym, or fancy equipment needed. All you need is weights, and if you don't have that, you can still do it. Below, I will be describing every exercise that is in the challenge (there are 10), with a picture for a visual. I will be starting with 5lb weights, and hopefully building up to 10lb by the end of the challenge. You can begin with whatever you choose, no weights if you are a beginner if that's what you wish. The point is to commit to do this daily. We can use this as our forum to check-in, look for motivation from others and be held accountable for staying on track. If you choose to do this, I encourage you to take a picture (in like a bikini or undies) from all angles (front, back and both sides) for you to compare, and see the difference in your body. 
Here are the exercises that are in the 50 day challenge:

1. Bicep Curl
    Begin with your feet at hips distance, and knees slightly bent (NEVER locked). Have weights held loosely in hands, without gripping them too tightly, palms facing out and away from body. Keeping elbows tight to the body, bend arms bringing weights up to shoulders. with control, go back to starting position, stopping just shy of straight arms. You never want to "swing" the weights, and biceps should remain active the entire time.
Repeat 50X


2. Hammer Up
    Everything remains the same as the bicep curl, except you turn your weights to face one another. Your palms remain in the whole time, elbows remain tight to body. Your arms mimic a "hammering" motion. 
Repeat 50X


3. Fly
    Standing with your feet at hips distance, bend knees to a squat position. flatten back to parallel with the ground, arms reaching to the floor with palms facing one another. Staying in that position, raise arms up to a "T" position, in line with shoulders, weights facing down. With control, bring arms back to starting position. The arms are never locked during this, or any of these exercises.
Repeat 50X (This one is pretty difficult, you can split it up into reps if you choose)


4. Chest Press
   Standing with feet hips distance, and knees slightly bent, bring arms up to a T, then bend in to a 90 degree angle. Be sure to keep shoulder blades pulling together to avoid your shoulders riding up and ensuring your neck stays relaxed. From there, keeping elbows in line with shoulders, bring arms in to center. With control, go back to starting position.
Repeat 50X


5. Press Up
    Begin this one the same as the chest press, with arms at shoulder height, and bent to a 90 degree angle. Now, keeping the palms forward and shoulders down, press arms up to touch weights over the head. With control, bring arms back to starting position.
Repeat 50X


6. Tricep Kickback
    Going back to the squat position we were in for our flys, bend  arms into hammer position, elbows tight to the body, palms facing in. Pulling the shoulder blades together and keeping elbows tight to the body, bring arms back to be parallel with your body, then with control, back to starting position. This exercise in particular, be careful not to "swing" into it, and really target the triceps.
This one, like the flys, I recommend breaking into reps; it's a burner, for sure!


7. Push-ups
   Pretty self explanatory. Don't feel obligated to do these up. There is NOTHING wrong with putting the knees down. In fact, I do a lot of my push-ups on my knees. It allows me to do more, and get deeper into the push-up. These, too, can be split up into reps, or done throughout the day. As long as you get your 50 in!


8. Sit-ups
   These are the old fashioned ones. No crunches here. Lie on back with feet on floor, hips distance, and knees staying in line with toes. There are two options here: arms behind head, then sitting up and reaching arms to ceiling OR holding medicine ball or weight and raising it over your head as you sit up. Choice is yours, just be sure that the chin/neck stays long throughout. You should be able to make an "L" with your thumb and pointer finger, place your finger under your chin and your thumb on your chest. That alignment should remain throughout sit-ups. If you do that, you know you are working your abs, and not your neck!
Repeat 50X


9. Squats
   Plain old squats. Have feet hips distance, arms down by sides. Being sure to keep knees over toes, sit back as if you are sitting on a chair, bringing arms up to be parallel with the floor. Be sure to engage your core, keep back nice and long (no hunching) and to breathe! 
Repeat 50X


10. Plank
    I'm sure you've all done a plank. Yes, they suck, but the rewards far outweigh the pain you feel while holding it! I ask you to not hold the hands together, but to place elbows, and hands on the floor, keeping wrists and elbows in line. Pull out of shoulders, engaging abs, keep butt/hips in line with shoulders and ankles and push through the backs of your heels to elongate and engage legs. Most importantly KEEP HEAD IN LINE WITH SPINE!!!! I am crazy OCD about this. The second you drop your head, which you will want to do, your alignment is shot. Look past your fingers, find a gazing point. Find your edge and endure. You may feel like you're going to die, you won't. Push through it!
Hold for 60 seconds


Who's with me???
We will be using this blog as a forum talking about your challenges with it, your triumphs, answering questions, holding accountability, getting/giving motivation, doing this TOGETHER. If it helps you, you can just comment with a "done" or "check" at the end of everyday. I know I will be doing that!

This can be done in segments throughout the day, or all at once. It doesn't matter, as long as all the elements are done by the end of each day. The stronger you get, the more you can do at once.

I am so excited to embark on the challenge, and hope to have others alongside me to motivate and inspire me. Beginner or fitness expert, anyone can do this! Let's do it!!


Sunday, November 10, 2013

GREENS, VEGGIE & HERB SOUP

Well, that time of year, Fall, is already upon us. Living in L.A., it's very easy to forget, and hard to believe, that it is actually Fall. If it were not for everyone's FB posts and IG photos of their Pumpkin Spice Lattes and Butternut Squash soup, reminding me of this season, I would forget it exists. I mean, we've barely dipped below 80 degrees here (trust me, I am NOT complaining about that!) so it doesn't feel anything like the Fall in Pittsburgh that I remember from childhood. Snow on Halloween? No problem, layer it up. Every year your costume had to be planned around if you could fit a freaking winter coat underneath it. I just laugh when people back home say they'd miss the 4 seasons if they lived in a warm climate. One year without having to get up, go outside at the crack of dawn to start your car a 1/2 hour before you leave the house so it can "defrost", then having to scrape your windows before being able to drive, and I think their tune would change! 
Anyway....I digress........
Point is Fall is here, cold weather or not, and everybody posting about Fall things made me crave soup. That, plus that fact that my allergies are out-of-control, leaving me with a scratchy throat and stuffy nose. Soup is soothing, comforting. Like a warm blanket on a cold night. I love all types of soup, but in my opinion, nothing beats a soup loaded with veggies. The best thing about soup is it's easy, once the prepping is done, you just close the lid, and let the magic happen! You can modify this recipe to cater to your favorite veggies and herbs, or to whatever you have in your fridge, but this particular combo of veggies/herbs turned out great, and gave the soup a fantastic flavor. I recommend trying it this way! 

GREENS, VEGGIE & HERB SOUP
(Serves 6-8)

*3-4 TBS Extra Virgin Olive Oil
*1 large yellow onion, diced
*3-4 large carrots, peeled, and sliced into coins
*1 large leek, or 2 medium, light green and white parts sliced into rings
*3 cloves of garlic, minced
*2 TBS EACH, of 3-4 different FRESH herbs of your choice, chopped. I used Dill, Basil and chives
*1/2lb (half of a bag) of frozen, Organic corn
*1/2lb (half of a bag) of frozen, Organic sweet peas
*1/2lb of fresh, Organic spinach
*4-5 large leaves of rainbow chard, stems and leaves, chopped
*7-8 C of vegetable stock/broth. I use my homemade stock, but store-bought Organic works as well. Just be sure it's not loaded with added sodium!

Step 1:
Chop Onion, carrots and leeks


Step 2:
Heat oil in stock pot/dutch oven over Med-High heat
Add onion, carrot, leek mixture. 
Cook for 5-8 mins, stirring every few minutes, until veggies start to "sweat" and soften up


Step 3:
While the veggies are cooking, chop your herbs and garlic


Step 4:
Once veggies are par-cooked, add the herb/garlic mixture 
Cook for 2-3 minutes, stirring frequently, being sure not to burn the garlic
Adding all the ingredients in layers will give your soup a depth and allow all the flavors to develop properly equaling major YUMMINESS!!


Step 5:
One cup at a time add your veg stock, being sure to stir after every addition, to deglaze (a.k.a, get all the yummy brown bits off the bottom) the pot
Cover, and lower heat to a simmer
 Allow soup to simmer, and the flavors to meld for 20-30 minutes

Step 6:
After you cover the soup to let it simmer, chop rainbow chard and wash spinach
Set aside
Go drink a glass of wine, relax, read, watch tv.....whatever the hell you like to do while the soup does it's thing

Step 7:
Add the corn, peas, spinach and rainbow chard
Cover and allow to simmer for an additional 20-30 minutes
Go back to drinking your wine

Step 8:
EAT!!
Your soup is done!
I think it is best served with a big, crusty piece of buttered (vegan butter, of course) bread or roll to dip in the super flavorful broth


This soup is like a big hug from Mom (or Grandma), will soothe your soul, give you your veggie fix, will pack some protein (chard has 3.5g per cooked C and spinach has 5.35g per cooked C) and will fill you up with yummy goodness!

This soup will stay fresh for 3-4 days in an airtight container in the fridge. I dare say it actually taste better the next day!

When you make it, I would love to hear how you liked it, and if you modified it, what your substitutions were. I'm always open to improving and learning from fellow cooks.

This soup is a giant HUG from me to you!
XO

Don't forget to follow me on 


@vegdancer


Friday, September 27, 2013

Raw Energy Bites

I don't know about you, but I have a pretty crazy busy life. Between practicing Yoga, training for races, teaching long hours at the Dance Studio and everyday tasks, life gets hectic. Although I cook 85% of my meals at home, teaching for 7 hours straight can take a toll on your energy level. When I'm in the studio, I don't really have time to eat a full snack; I need something that I can just pop into my mouth quickly, but also something that will keep my energy level high (nothing processed!). I've found the best thing are these energy balls. You can make them as small or as big as you like, depending on where they will be going with you. For long training runs, they can be made into mini-size, as not to take up much space and to be popped into the mouth and chewed quickly. There are many variations of these out there, and this is my version. I love the flavor combo, and I've rolled them in all of my favorite ingredients, for maximum energy/protein consumption. 

RAW ENERGY BITES
(Makes approximately 40, Medium-sized, bites)

* 1 1/2 C raw cashews
* 1 1/2 C raw almonds
* 2 tsp Himalayan salt
* 1-2 vanilla bean(s), scraped (depending on how vanilla-y you like them)
* 3 TBS flax meal
* 3 C dates, soaked for 30 mins in water,drained, then pits removed
* 1 C dried cherries
* 1 C raw, dried, coconut flakes

TOPPINGS:
* Raw hemp hearts
* Raw, dried, coconut flakes
* Chia seeds
* Cacao nibs
* Flax meal

TO MAKE:
~Put raw cashews, raw almonds, salt, vanilla and flax meal into food processor and process until nuts are finely ground.


~Then, with processor still running, slowly add dates, cherries and coconut, alternating between them, and allowing each to process until next round is added. 


~As soon as all ingredients are incorporated, remove and place into a bowl. Mixture will be very sticky!

~With damp hands, begin to take mixture, 1 TBS at a time, and between palms roll into balls. Place balls on parchment lined baking sheet until all "dough" has been rolled.
~Now, you're bites are ready to be rolled into the toppings! Set up all of the remaining ingredients into separate bowls. Take your bites and roll them in your mixture until evenly coated and place back onto parchment lined sheet. 
     *TIP: I would suggest doing each topping before moving on to the next (example: make all 10 rolled in chia, then move on to the coconut) because it gets pretty messy and the toppings will stick to your fingers!
~Your bites are done!! All you need to do is store them in an airtight container. They should stay fresh, in the fridge, for over a week.

The Finished Product:
Cacao Nib Bite
Chia Bite


Hemp Heart Bite

Coconut Bite


Try these out on your next long run, cycling train, road trip, hike, dance marathon or wherever you need a natural boost, and let me know how it goes! No need for those overly-processed "energy" bars full of chemicals, this is nature's candy, and it's damn good!
ENJOY!!!


If you'd like to know more about the benefits of raw over roasted nuts, click on the link below:
http://www.3fatchicks.com/raw-nuts-vs-roasted-nuts-the-truth/

Monday, September 23, 2013

Hands Off My Fritzi Dog!!!

  Well, anyone who knows me knows I LOVE to eat! Yes, I eat vegan (all the time) and clean about 80% of the time, but I love to go out, indulge, and feed my inner fat kid whenever I get the chance. I am very fortunate, living in Los Angeles, because it is a vegan paradise here. Everywhere I look, a new vegan joint is popping up, and so many restaurants offer vegan options. The vegan food we have here is top-of-the-line, and it is BOMB!
  I have a list of all of the vegan restaurants that I want to try, and I'm not even halfway through it. Thanks to my addiction to Instagram, and the amazing vegan community on there, I continue to discover more and more places to eat! Since I enjoy eating (we all do, right?!?), and spreading my love plant-based food to everyone, I am going to start posting reviews of all the yummys I eat in L.A., and wherever else my travels take me. Today's review: FRITZI DOG!!

Fritzi Dog is located in the fabulous Farmer's Market on 3rd & Fairfax, which is connected to The Grove. It is owned by the acclaimed Chef Neal Fraser (BLD) and takes hot dogs to a whole new level. Since discovering Fritzi, about 6 months ago, I have been several times, trying many different toppings, but this last trip I found my perfect dog. Allow me to elaborate.....


There is only one "dog" option for us vegetarian/vegans, but to me, it doesn't matter because it's that damn good. Allow me to introduce you to the CARROT DOG. If you live in Los Angeles and haven't already met, you need to. The Carrot Dog is not in any form like the processed soy dogs we vegans are used to throwing on the grill. It's not ground up carrot mixed with other ingredients and formed into a dog-like shape. No, the carrot dog is a carrot, like a whole carrot. Don't be fooled though, Chef Neal Fraser doesn't just cook a carrot and slap it on a bun, he takes that carrot and slow cooks it, sous-vide in 26 Arabic spices, and then finishes it off on the grill. Are you salivating yet? You should be!

There are MANY yummy vegan-friendly topping to choose from, and you can choose as many as you want for no extra charge! That's a steal, since the dog is only $5!! Your topping choices are:

*Ketchup
*Sriracha Ketchup (yeah, that's right, I said Sriracha!)
*Brown Mustard
*Spicy Mustard
*Super Spicy Mustard
*Sweet Mustard
*Yellow Mustard
*Pickled Relish
*Jalapeno Relish
*Grilled Onions
*Raw onions
*Warm Sauerkraut
*Grilled peppers
*Salsa Verde
(There are more toppings available, but these are the ones plant-based eaters can have)

The Pretzel bun is vegan, so I always stick with that. Like I said, I have tried many topping combos, all good, but my last trip, I found what will be my "Usual".
I chose:

~Sriracha Ketchup
~Super Spicy Mustard
~Jalapeno Relish
I LOVE spicy, and this totes hit the spot without overtaking the yummy carrot. All of their condiments are house made, and you can tell.

 
Before I finish I must also tell you what is as exciting, or maybe even more exciting, than the Carrot Dog itself. TATOR TOTS. You heard me peeps, tator tots. I've searched high and low for a place to get tots since turning vegan. Seems like everywhere I went they either contained egg, or they didn't and they fried them in an unvegan-friendly place. I am a tot lover, so when I found out the tots at Fritzi were vegan I about died. Let me tell you, they do not disappoint! They are nice and crisp on the outside, and soft and yummy on the inside. The order is pretty big, and only $3, which is good cause if I'm gonna go for tots, I'm gonna go BIG. I personally like to dip my tots in the yumminess that is on top of my dog. If you're not a tot person, their fries are also vegan. I haven't tried them, but I've heard they are good. Can't decide?? You can get 50/50, half tots, half fries. I say, get the tots!!!


Well, that's my review....clearly I like the place! I'd love to hear what your experience has been at Fritzi. What's your fav topping combo? Are you a fry or tot kinda person? Talk to me. I hope this inspires you to run out and grab a dog, errrr, I mean carrot. Who would've thought a carrot dog could be so damn good? Way to go, Chef Neal Fraser, and thanks for giving us veg heads something interesting, creative and yummy to eat!
I leave you with the photo.....commence your drooling....


Now go out and get your damn Carrot Dog!!! Unless, you don't live in L.A......which I'm pretty sure now that you wish that you did.....